Today is our first Card Club of 2013. I love Card Club and the ladies that participate in it, we have so much fun together. Anyway, January's theme is Valentine's Day.
Recipe:
A2 Card
Stamp mat - Elegant Edges - White Shadow @ 5"
Stamp mat - Elegant Edges - Pink Oblong @ 5"
Mailbox - Doodlecharms @ 3"
Letter - Doodlecharms @ 1.5"
Post - 3/4" x 2.5"
Banner - Artiste @ .40" (on Gypsy)
Tiny Hearts embossing folder - The Paper Studio
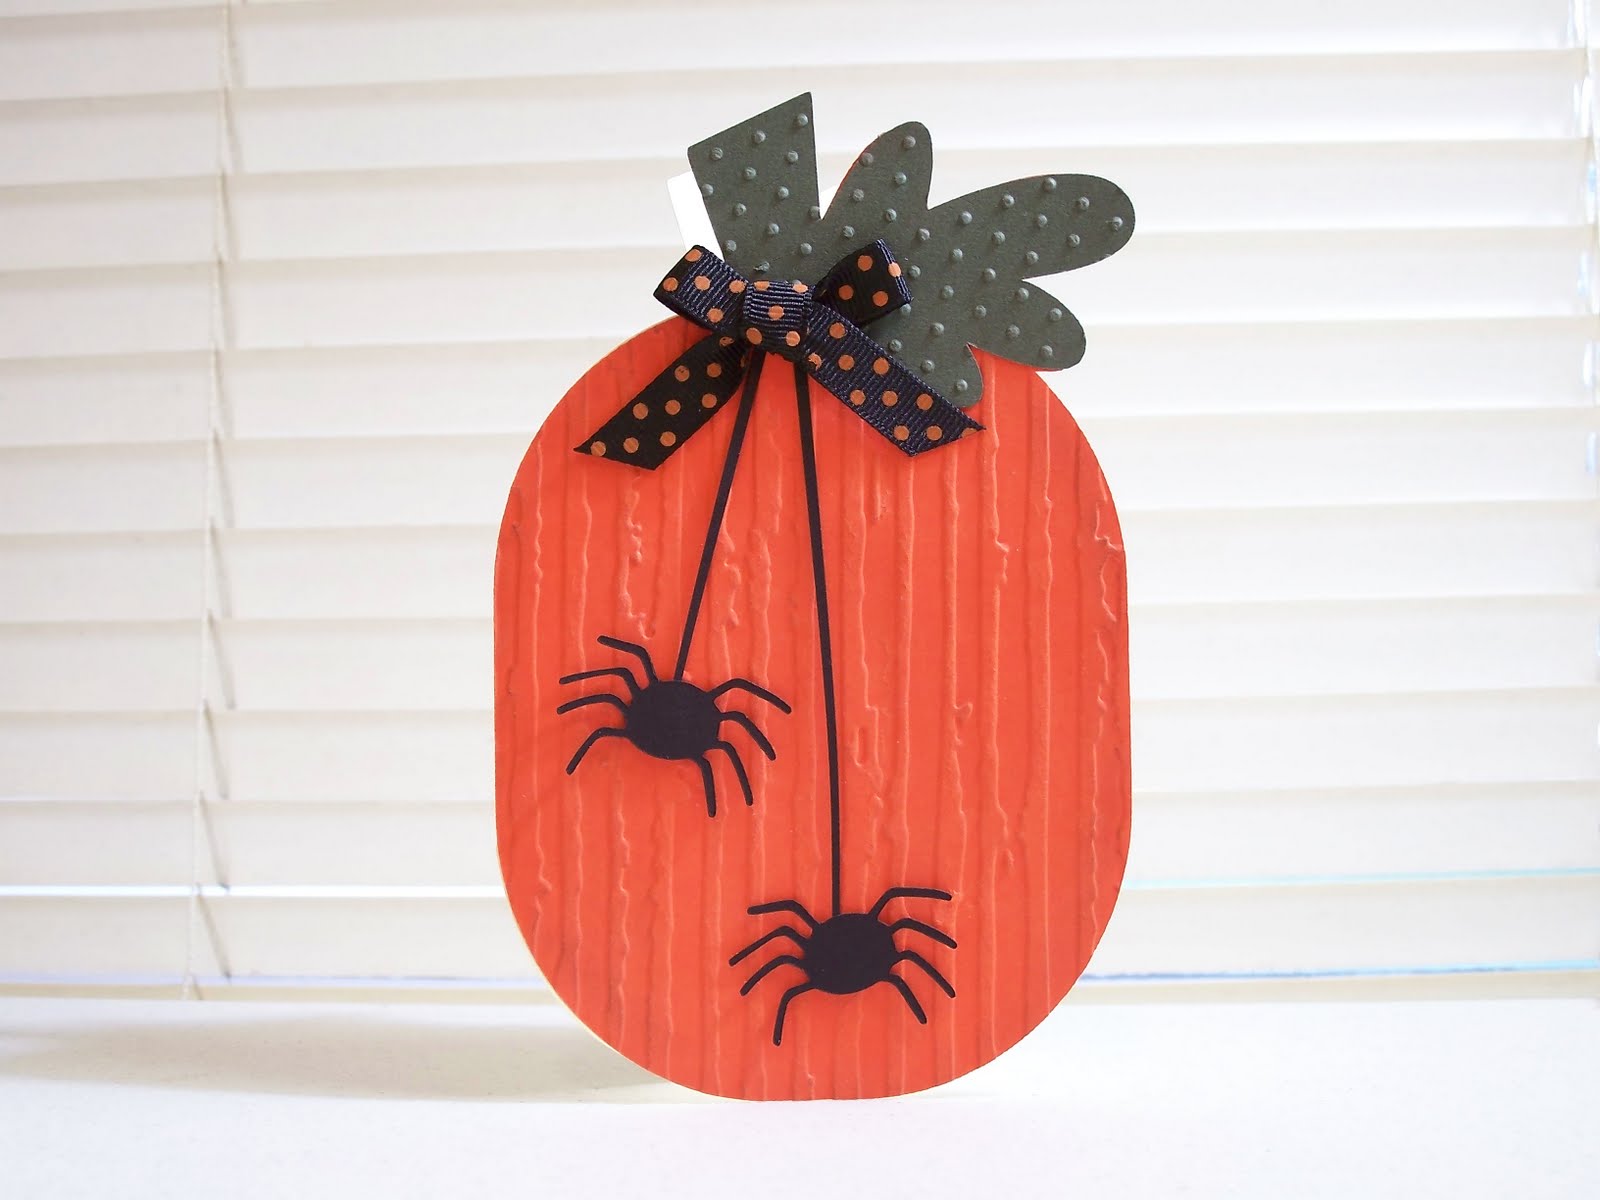
Woodgrain embossing folder - Tim Holtz
Thanks for looking,
Melissa
Showing posts with label Doodlecharms. Show all posts
Saturday, January 5, 2013
Thursday, December 27, 2012
The End of 2012 .....
Sorry I haven't posted anything since Halloween. Life seems to be getting in the way of my crafting. I will be posting my Thanksgiving and Christmas cards in the next couple of days.
Thanksgiving Card 1:
I scraplifted this adorable fall card from Mary over at CardzTV. You can find all of her instructions here.
Thanksgiving Card 2:
I saw this cute card here.
Thanksgiving Card 3:
Recipe:
A2 Card (in brown)
Mats: Cream - 2" x 3.25"; 3" x 4.25"; 4" x 5.25"
Mats: Brown - 2.25" x 3.5"; 3.25" x 4.5"
Put cream mats together using repositionable adhesive. Stamp design starting in the center working outwards. Take apart and add brown mats.
Thanks for looking,
Melissa
Labels:
Cuttlebug,
Doodlecharms,
Elegant Edges,
Teddy Bear Parade
Tuesday, May 29, 2012
Mother's Day
This is the Mother's Day card I created for my grand-daughter to give her mommy. I saw this on Amanda's blog.
Recipe:
Weld together a 5.75" x 5.75" square from Plantin SchoolBook to the flower (6.10" x 5.75") from Plantin SchoolBook.
Cut ladybug from Doodlecharms @1.25"
Green patterned mat cut at 5.5" x 5.5"
Orange face cut at 6.9" x 6.5"
Thanks for looking,
Melissa
Recipe:
Weld together a 5.75" x 5.75" square from Plantin SchoolBook to the flower (6.10" x 5.75") from Plantin SchoolBook.
Cut ladybug from Doodlecharms @1.25"
Green patterned mat cut at 5.5" x 5.5"
Orange face cut at 6.9" x 6.5"
Thanks for looking,
Melissa
Labels:
Doodlecharms,
Gypsy,
Peachy Keen Stamps,
Plantin SchoolBook
Wednesday, January 25, 2012
MPS Inspiration #2
Day 2 of MPS Card Inspiration

Recipe:
A2 card
MPS Episode #100
Hello Kitty Greetings Cricut Cartridge
Buttons from the dollar bin at Michaels

Recipe:
A2 Card
MPS Episode #120
Hello Kitty Greetings Cricut Cartridge
Spots and Dots Cuttlebug Folder

Recipe:
A2 Card
MPS Episode #96
Doodlecharms Cricut Cartidge

Recipe:
A2 Card
MPS Episode #197
Forever Young Cricut Cartridge
Brads
Swiss Dots Cuttlebug Folder
Thanks for looking,
Melissa
Recipe:
A2 card
MPS Episode #100
Hello Kitty Greetings Cricut Cartridge
Buttons from the dollar bin at Michaels
Recipe:
A2 Card
MPS Episode #120
Hello Kitty Greetings Cricut Cartridge
Spots and Dots Cuttlebug Folder
Recipe:
A2 Card
MPS Episode #96
Doodlecharms Cricut Cartidge
Recipe:
A2 Card
MPS Episode #197
Forever Young Cricut Cartridge
Brads
Swiss Dots Cuttlebug Folder
Thanks for looking,
Melissa
Friday, December 9, 2011
Christmas Cards - 5
Santa
I love this Santa. There is so much you can do with him. I did this on the Gypsy so that I could weld the two shadow pieces together to form the card base.

Recipe:
Weld 2 shadow santa heads from the Doodlecharms cart at 4.95"
All pieces cut at 4.95"
Black Brads for the eyes
D'Vine Swirl cuttlebug folder for the beard and mustache
chalk to rosey up his cheeks.
Thanks for looking.
Melissa
Saturday, December 3, 2011
Christmas Cards - 2
Snowman Card
I just love snowmen, so I have lots of them around my house during the holidays. Probably becuase you can keep them out until February.

Recipe:
A2 card
Mat cut at 4" x 5.25"
Snowman cut at 3.25" - blackout - from the Doodlecharms cartridge
Face stamp - Peachykeen stamps
LaPlume markers
Black Brads for the pieces of "coal"
Let it Snow stamp - I picked it up at either Hobby Lobby or Michael's
Thanks for looking,
Melissa
Sunday, September 25, 2011
Candy Corn Halloween Cards
This is another scraplift from the Nothin' Fancy blog (she has some really GREAT ideas).
I had to cut the entire candy corn in each color, trim them, chalk them, I then added some faux stitching (which I'm not very good at), and then stamped them with the cute little Peachy Keen Stamps. The wording I created in WORD.


Recipe:
A2 Card
Candy corns - cut at 9" (with all the other candies hidden on the Gypsy)
Thanks for looking,
Melissa
I had to cut the entire candy corn in each color, trim them, chalk them, I then added some faux stitching (which I'm not very good at), and then stamped them with the cute little Peachy Keen Stamps. The wording I created in WORD.
Recipe:
A2 Card
Candy corns - cut at 9" (with all the other candies hidden on the Gypsy)
Thanks for looking,
Melissa
Sunday, August 29, 2010
Pumpkin Card
I totally scraplifted this card from
The Cutting Cafe (http://thecuttingcafe.typepad.com) and
Kreative Korner By Kelly (http://kreativekornerbykelly.blogspot.com/).
When I saw this card I just had to make one. It is so adorable.
So, here is my version of it (of course created on the Gypsy):


Recipe:
Pumpkin - Mini Monsters - cut at 3.75" x 6" (real dial size)
Stem - Mini Monsters - cut a 2.89" x 5.9"
Spiders - Doodlecharms - cut at 1.47" x 1.10"
CuttleBug folders - Swiss Dots & Distressed Stripes
Thanks for looking.
Melissa
The Cutting Cafe (http://thecuttingcafe.typepad.com) and
Kreative Korner By Kelly (http://kreativekornerbykelly.blogspot.com/).
When I saw this card I just had to make one. It is so adorable.
So, here is my version of it (of course created on the Gypsy):
Recipe:
Pumpkin - Mini Monsters - cut at 3.75" x 6" (real dial size)
Stem - Mini Monsters - cut a 2.89" x 5.9"
Spiders - Doodlecharms - cut at 1.47" x 1.10"
CuttleBug folders - Swiss Dots & Distressed Stripes
Thanks for looking.
Melissa
Subscribe to:
Posts (Atom)